The company register is a summary of all the entities and counterparties in the system. They can be added manually or imported all at once by using the import template. Instructions further below.

Add new entity/counterparty
Click + icon on top right and following view opens.

Fill in the information, the fields are explained below.
Short name
Use a shorter or alternate name for the company if the official name is too lengthy or if there is another name commonly used within the company. NOTE: If a bank, short name has to be exactly the same name as in the API integration, otherwise the import will not work.
Long name
Full official name of the company or bank.
Base currency
Base currency of the company.
Country
Country where the company is located.
Internal / External
Click the right side of the grey bar if the company is a bank or other external counterparty. Internal company is the default setting.

Entity
Select when the company is internal, for example a subsidiary.
Counterparty
Select when the company can be a counterparty in deals and transactions.
Issuer
Select when the company can be an issuer of a bond or a stock, for example.
Bank
Select when the company is a bank.
Active Status
Select when the company is active. Unchecking changes the status as passive.

Integrations
When you are using an alias, make sure to include it. For instance, if you're automatically importing foreign exchange (FX) transactions from a bank, it's necessary to provide the alias ID associated with the company.
Additional
Additional information of the company including the postal address, counterparty code, entity code and profit center.
Limits
If the company has established limits for trade finance, foreign exchange (FX), or money market (MM) transactions, these limits can be entered in this section. Any limit set for trade finance will influence the Trade Finance dashboard and will be reflected in specific reports..
When all the needed information has been filled, click the 'Save' button on top right corner to save the data.
IFRS16
This section relates to the companies and conterparties with leasing contracts and accounting obligations.
Following tabs will only be visible after the basic information of the company has been created and saved first.
Audit trail tab
Shows the audit trail of the company profile including the time of change, user in question and the changed parameter information.
Attachments tab
Attachments up to 5MB each can be uploaded into the company profile.
Importing several companies
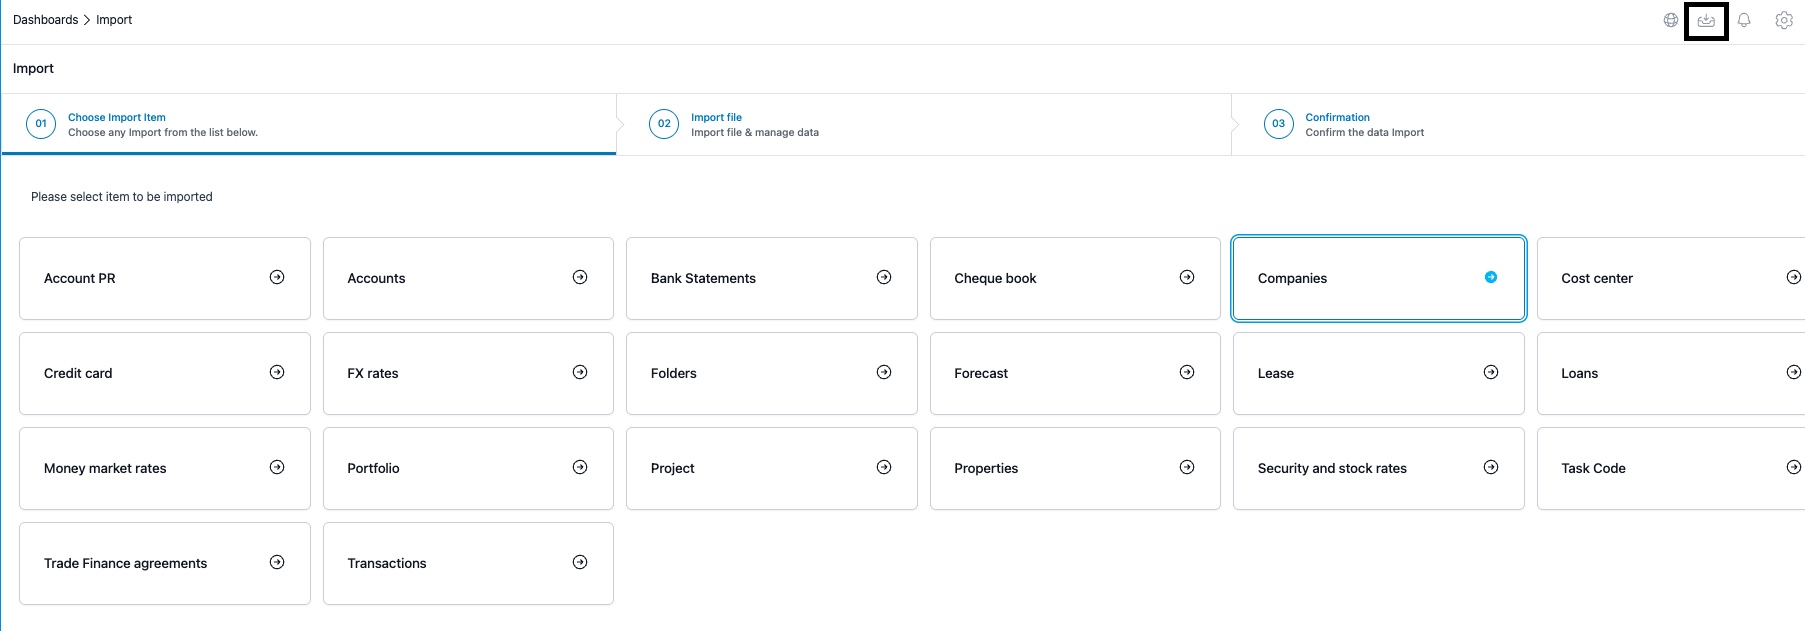
1. To import data for several companies, click on the import icon on right top corner and select Companies.
2. In this view, click on 'Download Sample.' After that, you will have the option to choose the format for importing your data: either Excel or CSV.

3. This file is a template. Remove the sample data and input the necessary company information. The columns for Short Name, Long Name, Currency, and IFRS Accounting (indicating whether the company follows IFRS accounting standards) are mandatory. In columns where you see numbers 1 or 0, use 1 to indicate 'yes' and 0 for 'no'.

4. Once you have entered all the necessary details for the companies and external counterparties, save the file. Then, upload it to ZenTreasury. Please ensure that the 'Country' field is filled in with the official country name, not an abbreviation.


5. Select the file you wish to upload. Once the file is imported, the following view will be displayed:
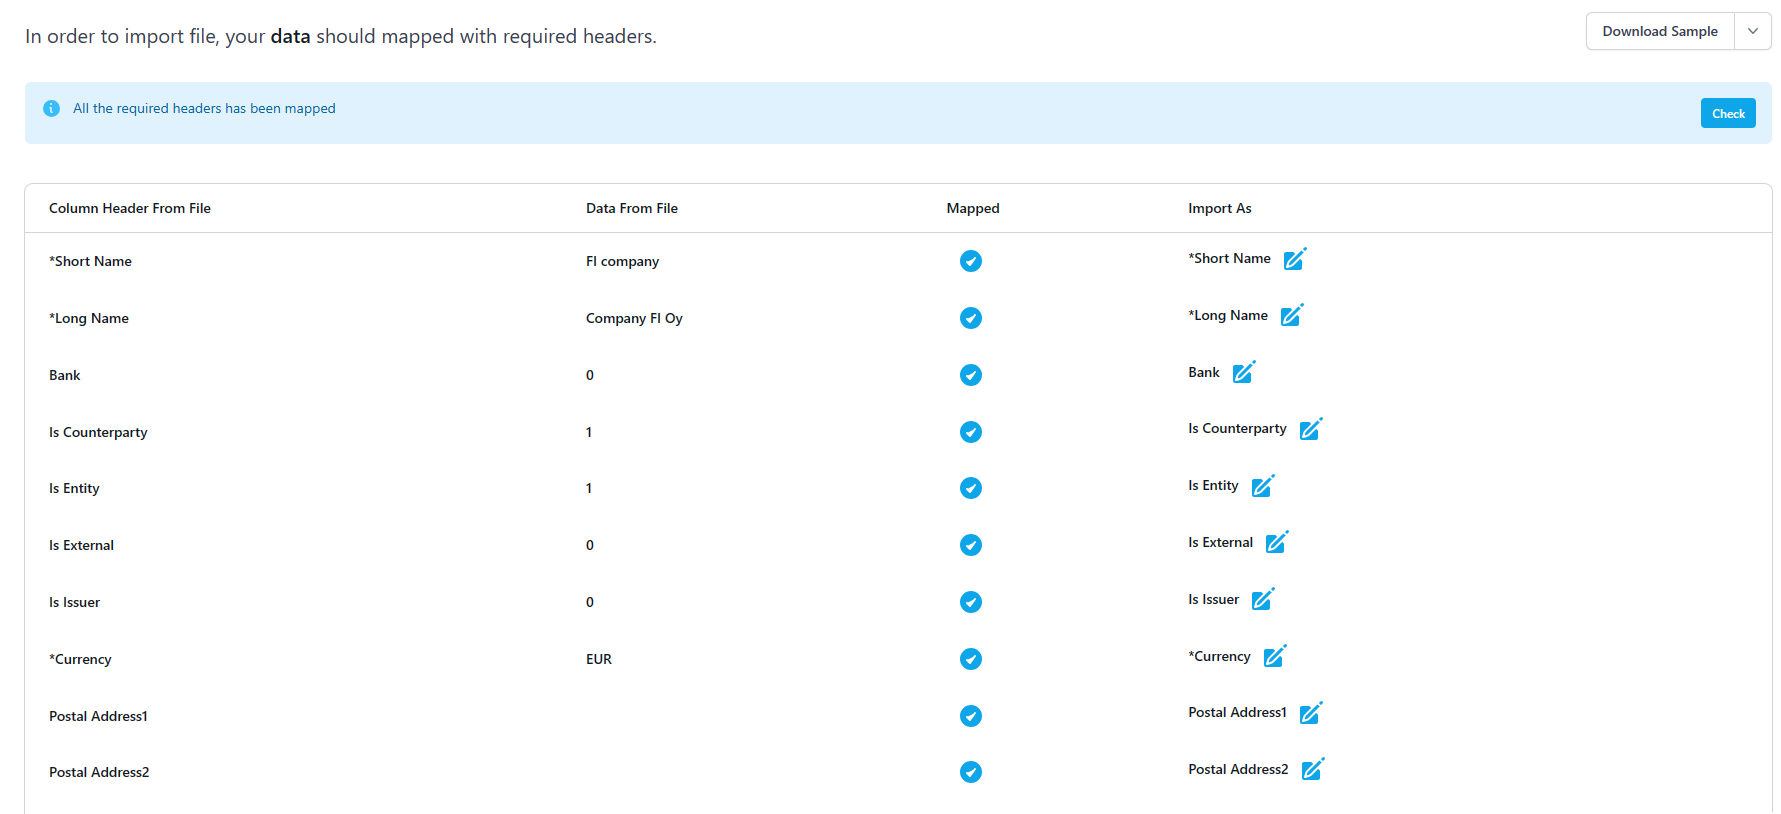
6. Ensure that all column headers from the file are correctly mapped. If a row is not properly mapped (which may occur when using a file different from the sample), click on the relevant header and then select the pen icon. This action will open a dropdown list, allowing you to choose the appropriate header.

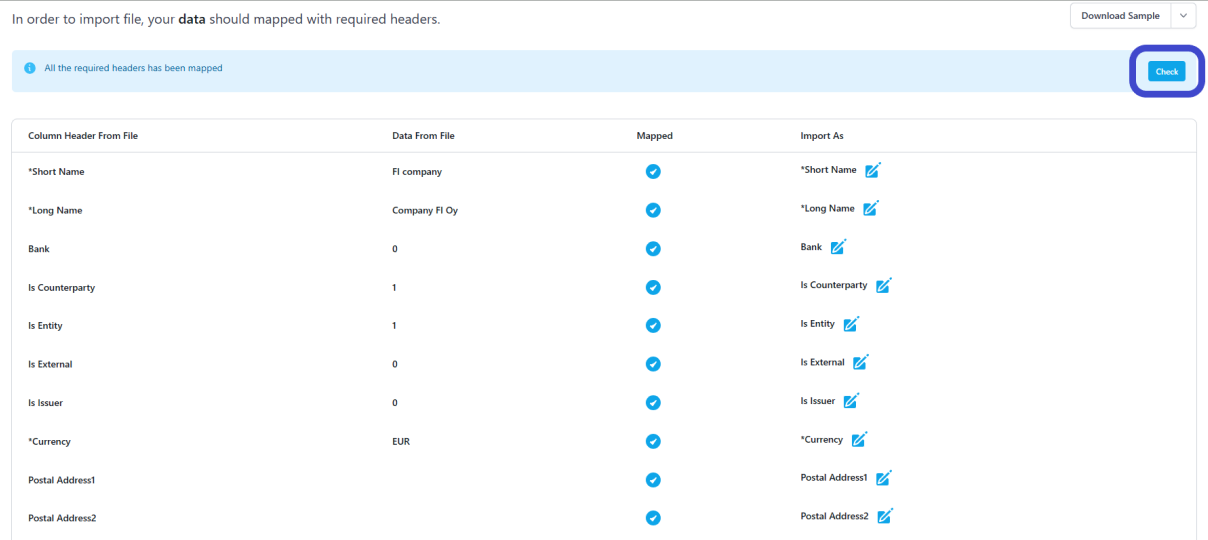
7. Once all headers are successfully mapped, click on the 'Check' button.
8. If there are no errors, the following view will appear. In this view, you can proceed by clicking the 'Import' button.

9. If there are any errors, an error message will display, listing the specific issue(s), such as a typo in a country name. It's important to note that country names must match exactly with those in the system (case sensitive). To verify the correct format, you can check under Settings - Common Data - Countries.
10. You will be taken back to the import page and you can navigate elsewhere.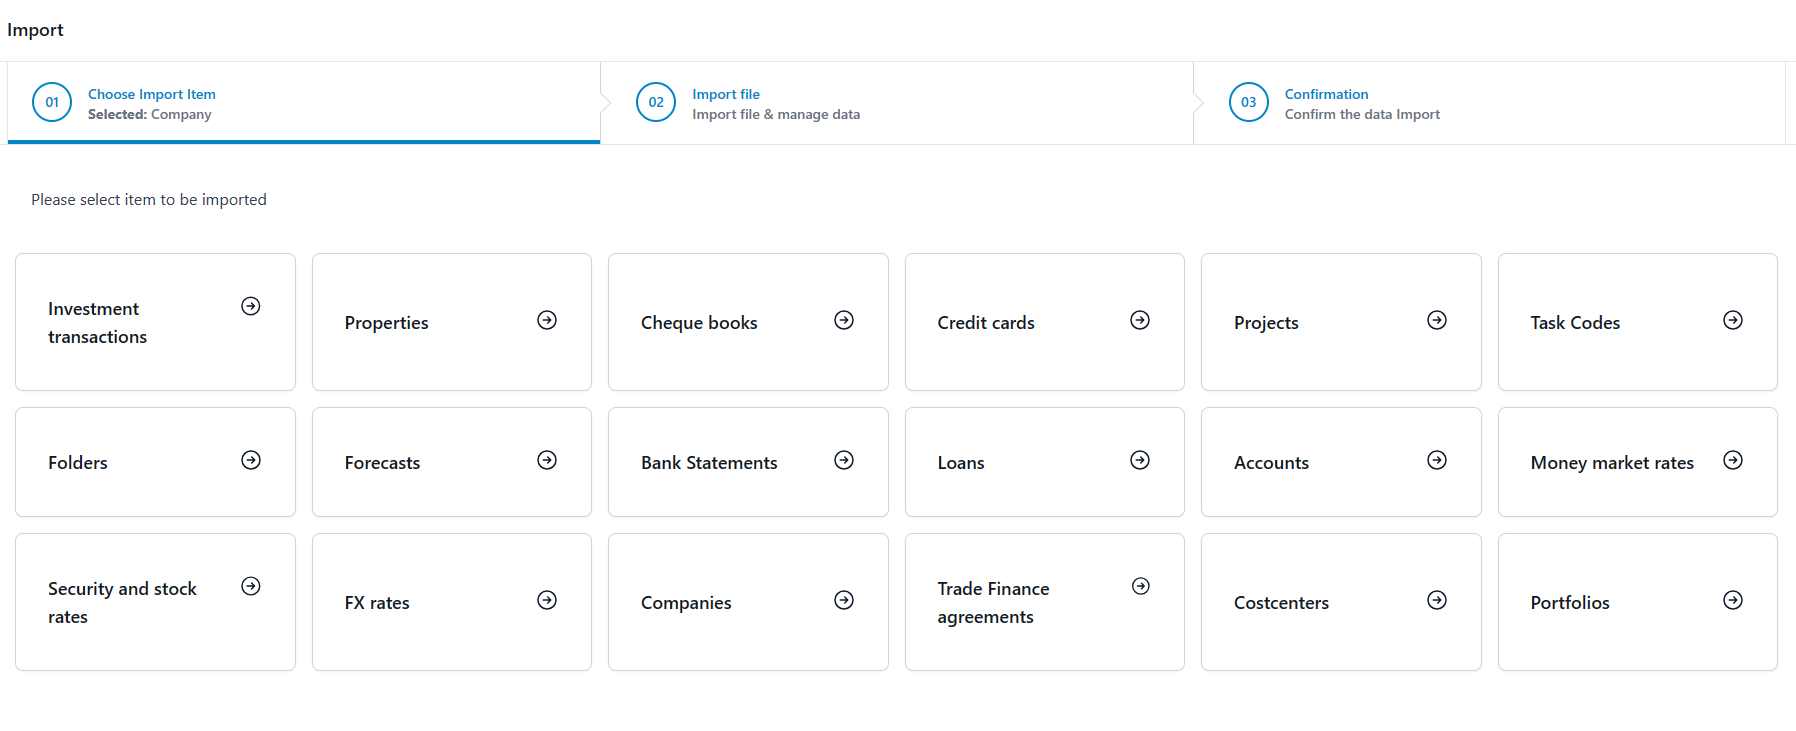
The import can take a moment, depending on the amount of companies you are importing. When import is complete, you will see the imported companies under Settings - Common Data - Companies.
Was this article helpful?
That’s Great!
Thank you for your feedback
Sorry! We couldn't be helpful
Thank you for your feedback
Feedback sent
We appreciate your effort and will try to fix the article